VerbMaster Teacher Guide

Module 4: Using VerbMaster in Your Classroom

VerbMaster was built to bring research-based learning methods (mastery learning, spaced repetition, multimodal practice) into a tool that's easy for both teachers and students. This module will show you how to set up your classes, assign work, and track progress, step by step.
4.1 Instructor Setup

Part 1: Instructor Sign Up

First, you'll go to verbmaster.co and click "Sign Up" in the top right corner.

1

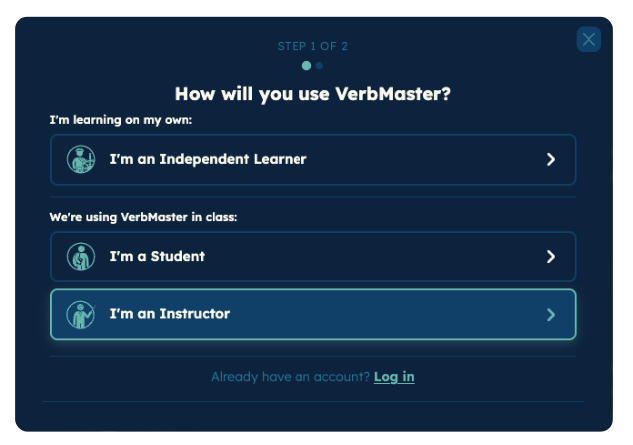
Select "I'm an Instructor"

Role picker with I'm an Instructor selected
2

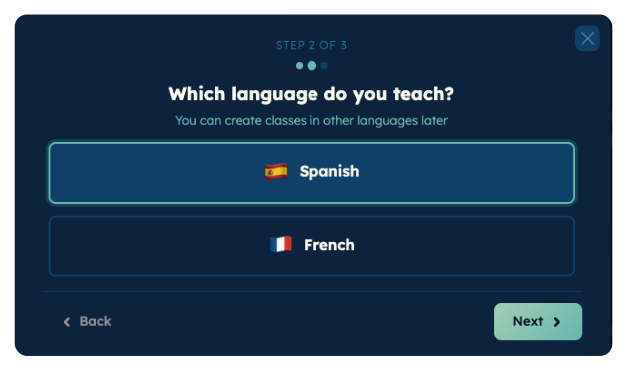
Choose your language

(You can switch back and forth once you're signed up)

Language picker showing Spanish and French
3

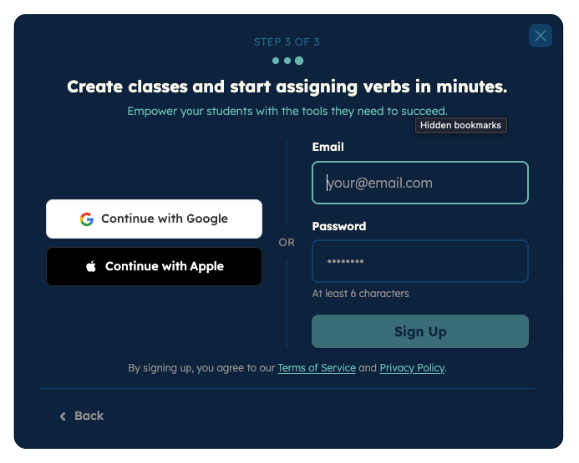
Use your school email

This email will be attached to Premium access and allow all students Premium access.

Sign up form with school email address
4

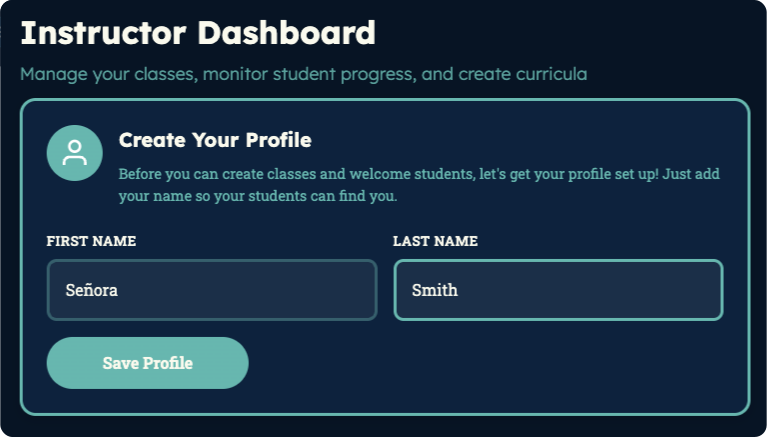
Create your profile

You'll land on your Instructor Dashboard, where you can add your name so your students can find you.

Instructor Dashboard with the Create Your Profile card

Part 2: Create a Curriculum

Go to your "My Curricula" tab in the top right to create your first curriculum.

1

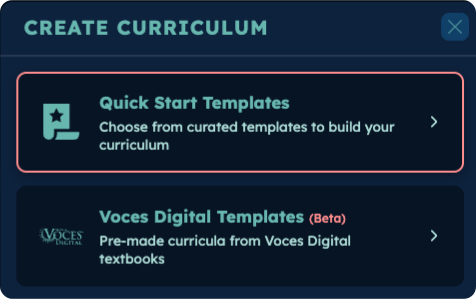
Start with a template

Choose a Quick Start or VOCES template to begin.

Create Curriculum panel with Quick Start and VOCES template options
2

Choose your course level

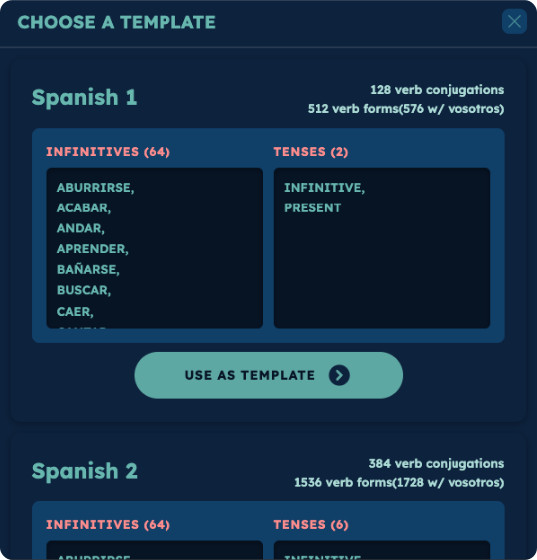
Template picker showing Spanish 1 and Spanish 2 with their verbs and tenses
3

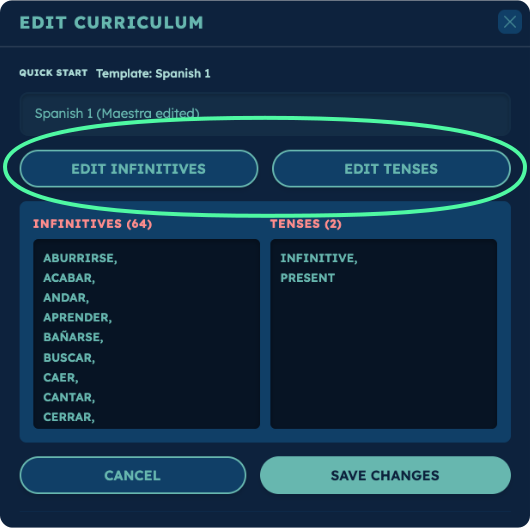
Customize it

Name your curriculum, then edit verbs and tenses as needed.

Edit Curriculum panel with the Edit Infinitives and Edit Tenses buttons highlighted

About Your Curricula

Once you create a curriculum, you can reuse it across multiple classes. The verbs, tenses, and assignments will stay the same, and any edits you make will update for every class that is using that curriculum. Due dates, however, can still be customized separately for each class.
Part 3: Managing Assignments

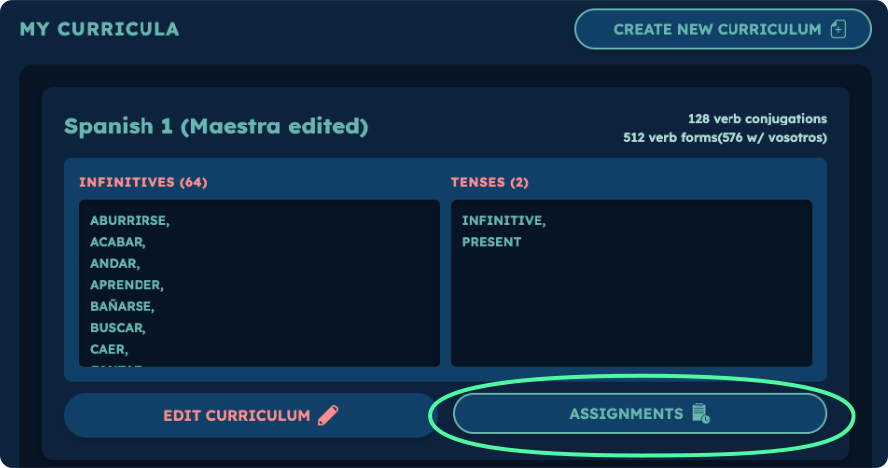
Once your curriculum is made, you can view and organize assignments from your curriculum card.

My Curricula card with the Assignments button highlighted
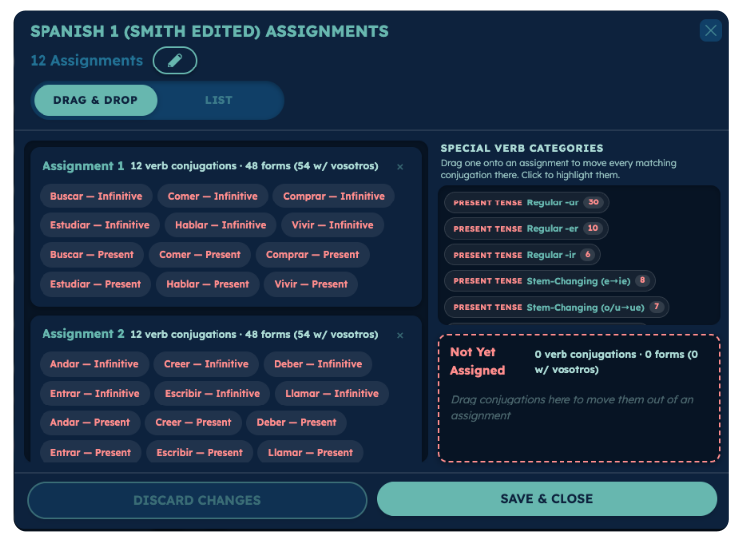
Assignments drag-and-drop canvas 1 2 3 4
1

Edit number of assignments

Change the number at the top to match how many weeks you're assigning. This spreads every verb out evenly again.

2

Reorganize content

Drag conjugations from card to card. Hold ⌘/Ctrl and click to pick out several, or shift-click a range within one assignment.

3

Move verbs by category

Drag a Special Verb Category onto an assignment and every matching conjugation moves there. Click one to highlight where they sit now.

4

Save & Close

Nothing can be left in Not Yet Assigned, and every assignment needs at least one conjugation. Changes apply to every class using that curriculum.

Part 4: Create Your Class

Now switch to your "My Classes" tab to create your first class.

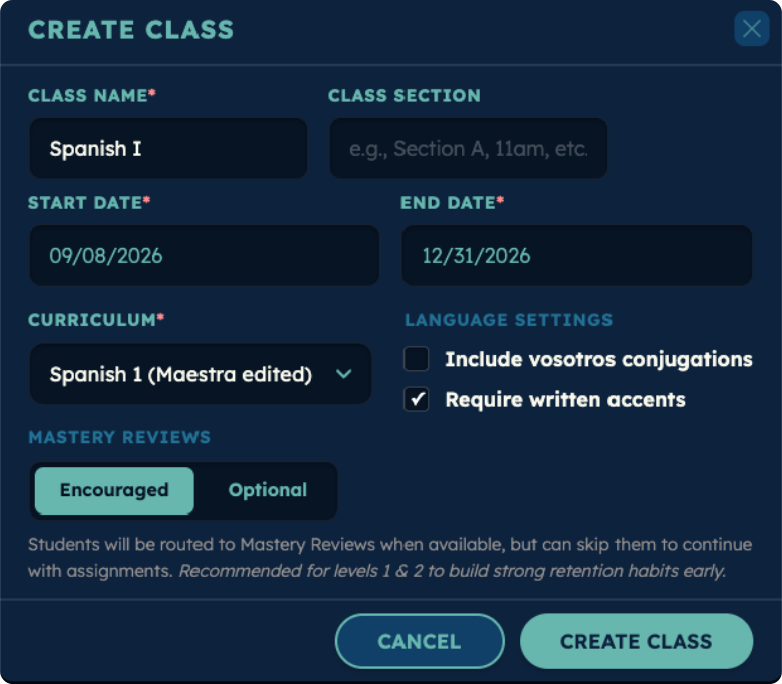
Create Class form with class details, curriculum and language settings 1 2 3 4
1

Add class details

Name your class, add a section, and set your term dates.

2

Select your curriculum

Choose the curriculum you just created.

3

Choose language settings

Decide whether to include vosotros and whether to require written accents.

4

Save your class

Tap CREATE CLASS and it will appear on your dashboard.

Mastery Reviews

For now, leave Mastery Reviews set to Encouraged. You can customize review schedules later on the class card.
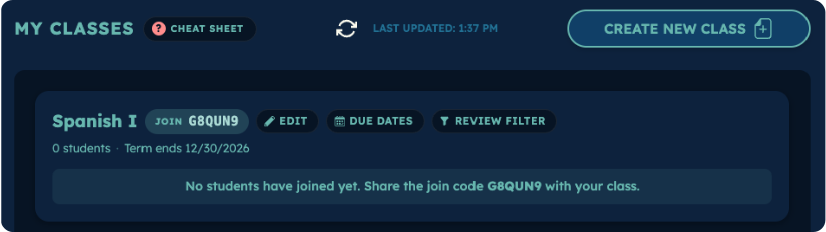
Class card on the My Classes tab showing the join code and the refresh control 5 6
5

Share the join code

Give your students the 6-digit code on the class card so they can join.

6

Check who has joined

Press refresh at the top to see whether every student is enrolled.

Part 5: Assignment Due Dates

Assignment due dates are automatically distributed throughout your class term.

1

Open Due Dates

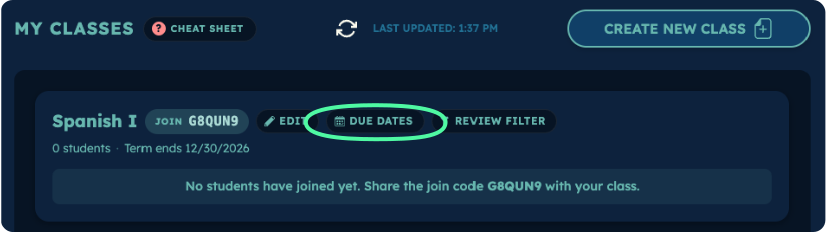
Find the DUE DATES button on the class card.

Class card on the My Classes tab with the Due Dates button highlighted
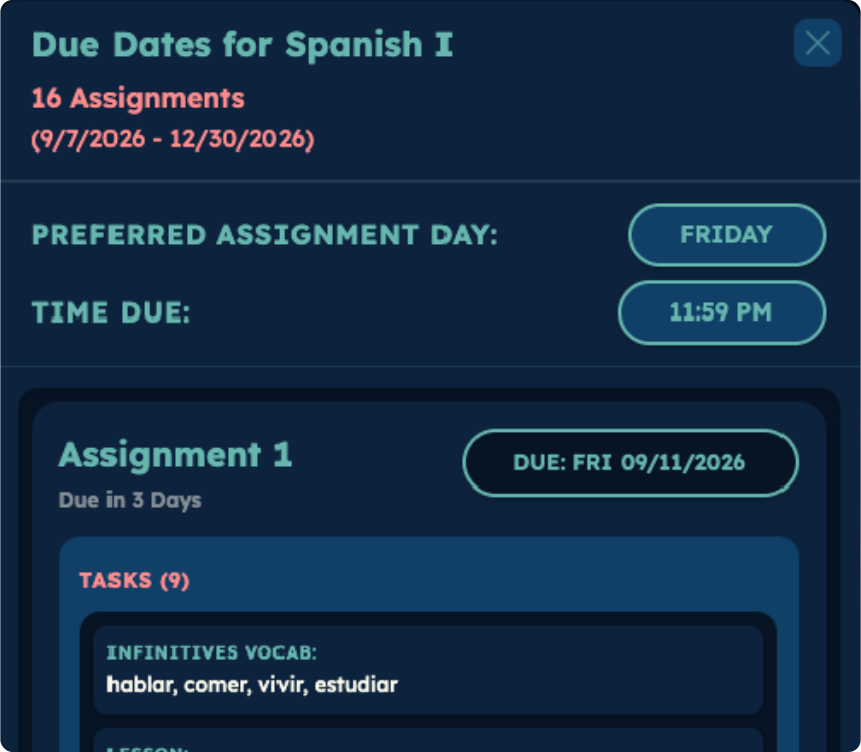
Due Dates panel with preferred assignment day, time due, and per-assignment dates 2 3
2

Choose your schedule

Set your preferred day of the week and time at the top. Every due date shifts to match.

3

Edit in order

When you change a due date, later dates update automatically, so it's best to edit them in chronological order.

4.2 Experiencing the Student Dashboard

Part 1: Joining Your Class as a Student

Switching to Student Mode lets you see VerbMaster exactly as your students do: assignments, practice, and progress tracking. This gives you valuable insight into the learning experience.
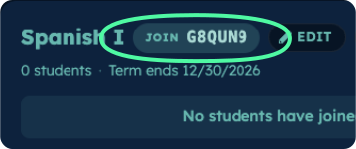
Before switching modes, write down the join code from your class card.

Class card showing the six-digit join code
1

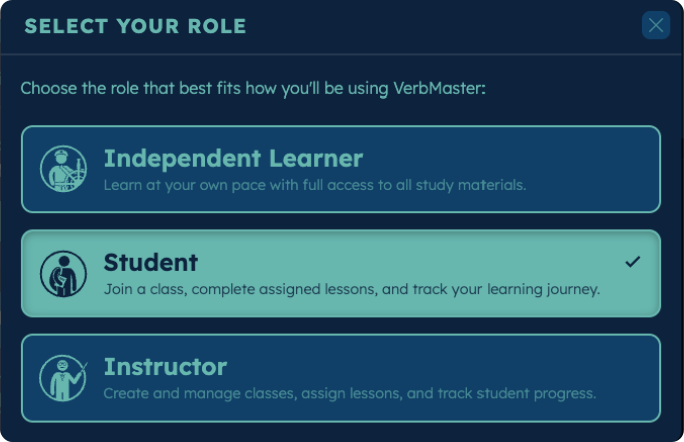
Switch to student role

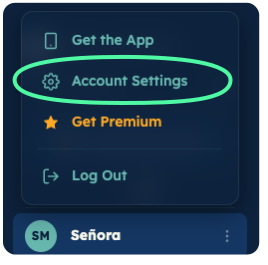
Go to your Account Settings and scroll down to the Role tab. Click "Change Role" and select "Student".

Main menu with Account Settings highlighted Select Your Role panel with Student selected
2

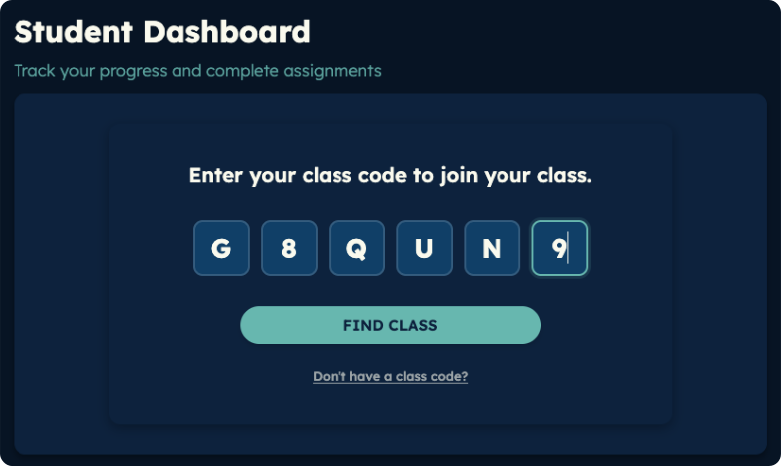
Join your class

Find the Student Dashboard in your menu and enter the join code you wrote down.

Main menu with Dashboard highlighted Student Dashboard asking for a class code

You can switch back and forth between Instructor and Student roles anytime under Account Settings. We recommend joining as a student at least once to better understand the learning experience.
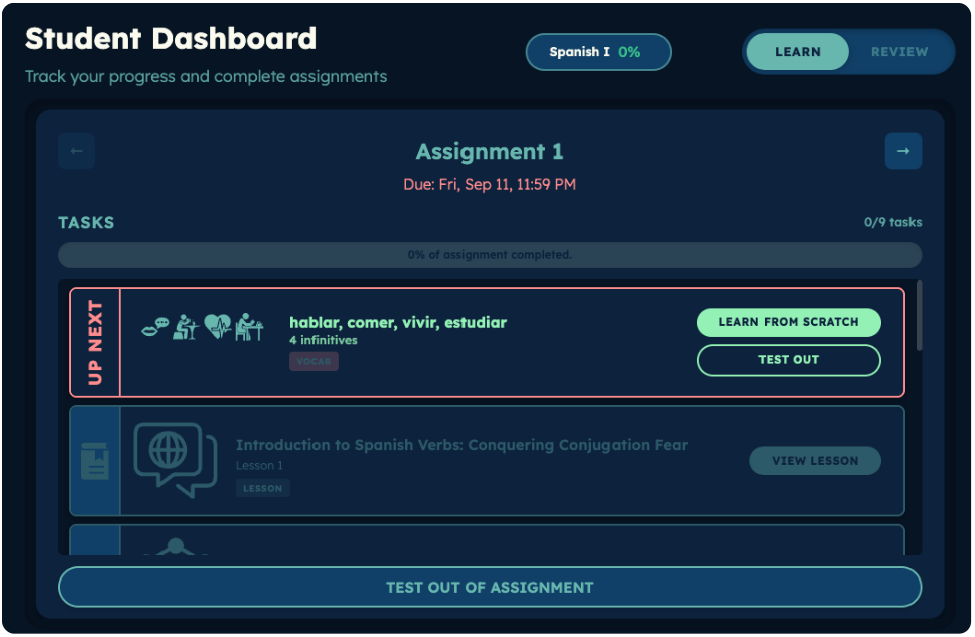

Part 2: The Student Dashboard

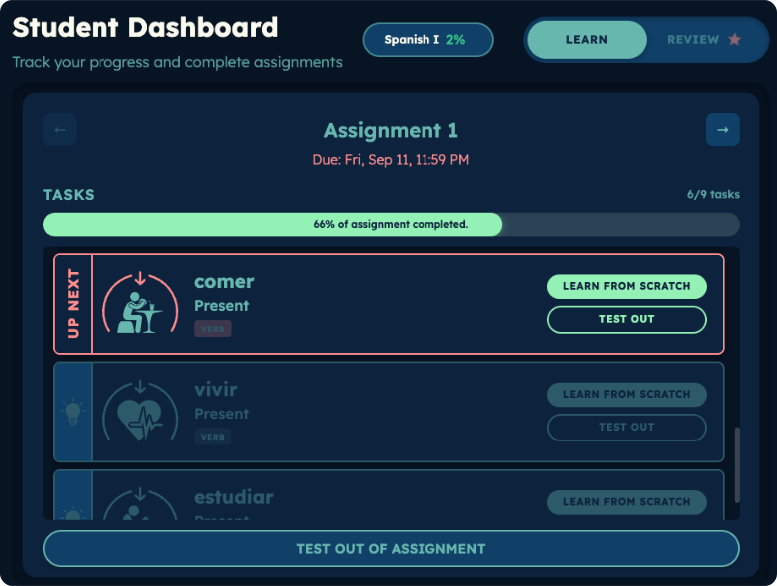
Once you join the class, the first assignment will appear on your dashboard.

Student Dashboard showing Assignment 1 and its task list

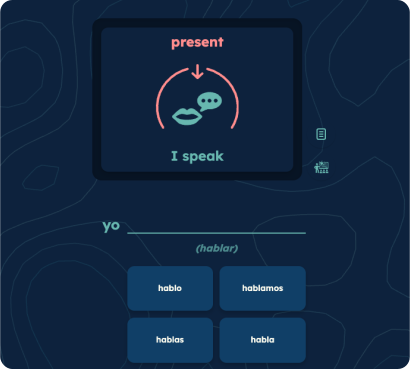
Assignments contain three types of tasks:

1

Infinitive Vocab Practice

Infinitive vocab task card

Up to 8 infinitives are grouped together so students can learn them more efficiently.

2

Verb Lessons

Verb lesson task card

Each lesson introduces a verb type in a specific tense, teaching the patterns students need before they start practicing.

3

Verb Conjugation Practice

Verb conjugation practice task card

After each lesson, students practice verbs using the concepts they just learned. Multiple-choice supports allow for different learning levels.

Part 3: Two Phases of Learning

Phase 1: Initial Learning

First, students learn conjugations from their assignment on the LEARN tab.

Student Dashboard Learn tab with assignment tasks
Initial Learning Options

Every verb task offers two ways in.

Learn From Scratch and Test Out buttons on a verb task
Learn From Scratch

Students see all conjugations first, then start with multiple choice questions.
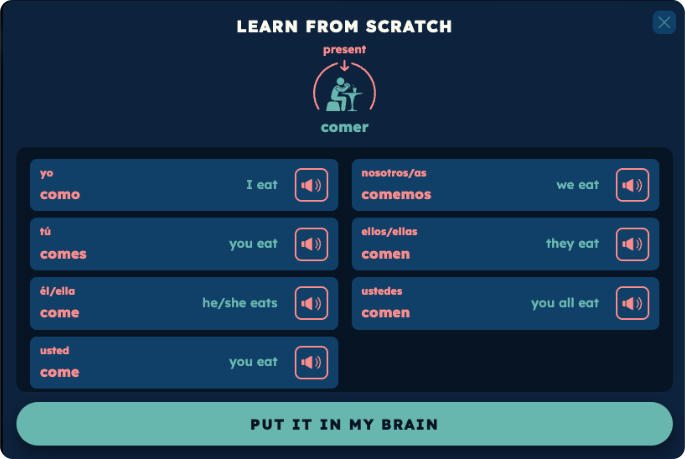
Learn From Scratch screen showing every conjugation of a verb Multiple choice question for a conjugation
Test Out

Test Out goes straight to fill-in-the-blank, so if students already know a verb well they can test out of it and won't review it as soon.
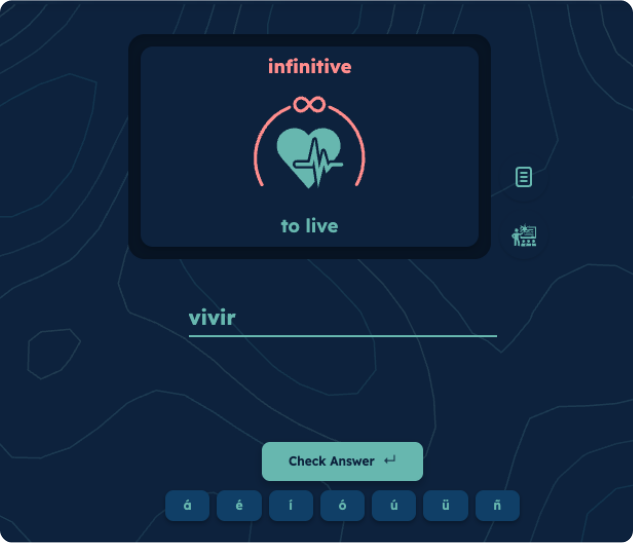
Test Out fill-in-the-blank screen

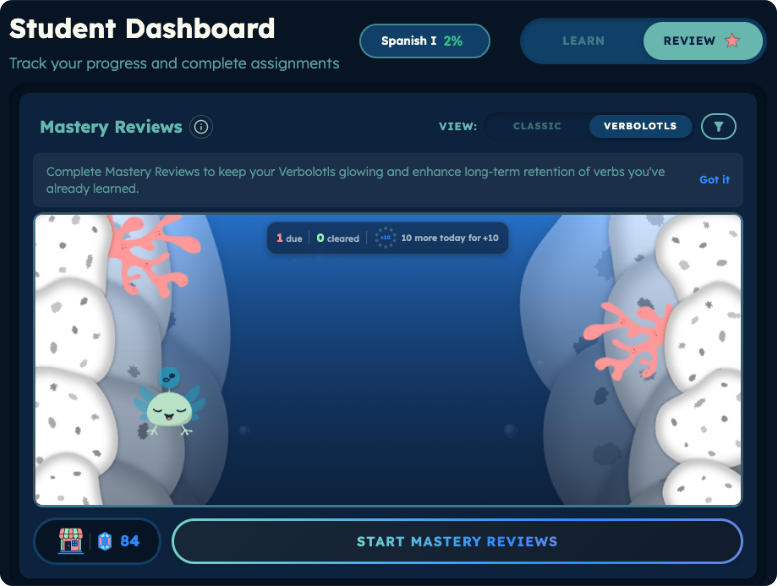
Phase 2: Mastery Reviews

Then they review every conjugation they've learned on the REVIEW tab at increasing intervals, to ensure long-term retention.

Student Dashboard Review tab showing Mastery Reviews
Zero reviews badge

Encourage your students to keep their Review counter at zero. Zero means they're caught up and retaining all forms; otherwise reviews are overdue and forgetting begins.
Part 4: Review Filter

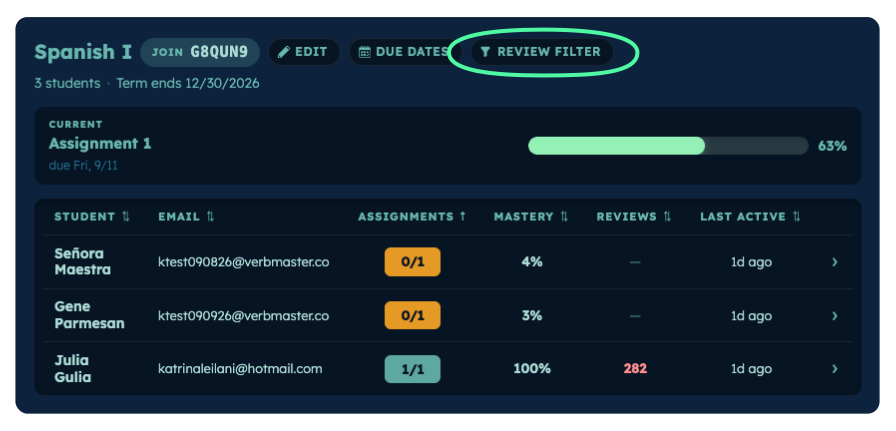
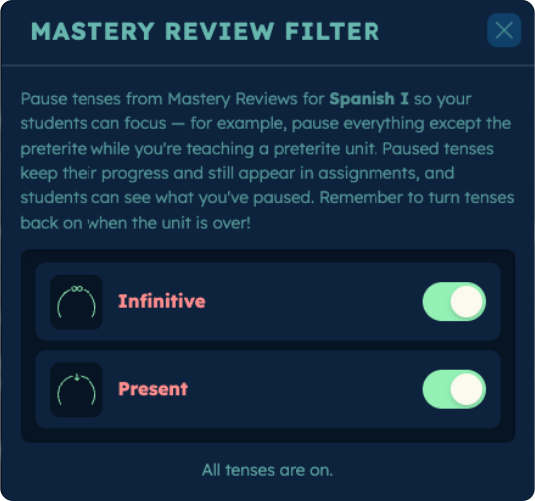
Use the REVIEW FILTER button on the class card to temporarily pause specific tenses from Mastery Reviews. Handy while your class is focused on one unit.

1

Open Review Filter

Use the button on the class card.

Class card with the Review Filter button highlighted
2

Pause by tense

Turn off only the tenses you want students to skip for now.

Mastery Review Filter panel with a toggle per tense
3

Turn them back on

A reminder appears on the class card while a tense is paused, so you remember to restore reviews when the unit is over.

Class card showing one tense paused from reviews

Best practice: keep Mastery Reviews on whenever possible. Use Review Filters temporarily when your class needs to focus on a specific tense, then turn them back on so students can continue reviewing the forms they need.
4.3 Monitoring Student Progress

Part 1: Class Progress

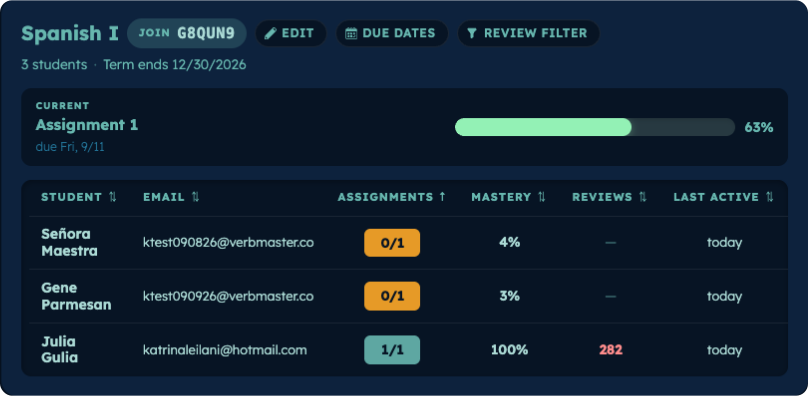
Your class dashboard is your starting point for monitoring student progress.

1

View class progress

See the current assignment and a quick snapshot of how each student is doing.

Class card with each student's assignments, mastery, reviews and last active
0/1 Assignments

How many assignments the student has completed so far.

4% Mastery

The student's current overall mastery across assigned material. This can rise and fall over time.

282 Reviews

How many Mastery Reviews are currently due. Lower is better. Ideally, keep this at zero.

today Last Active

When the student was last active in VerbMaster.
2

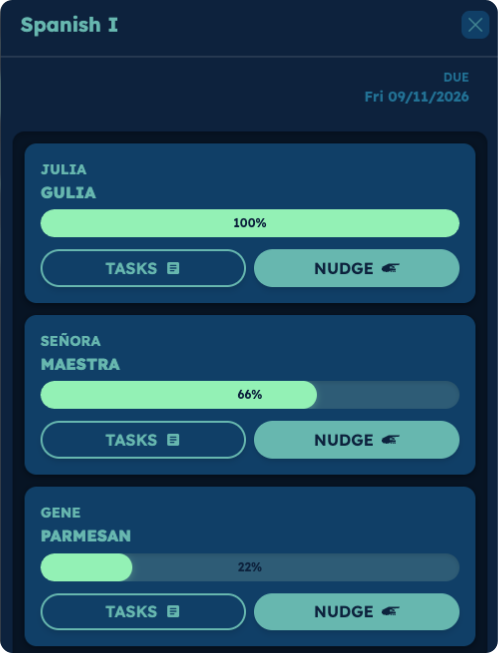
Check current assignment completion

Click the current assignment to see how much of it each student has finished.

Per-student completion for the current assignment

Part 2: Individual Student Progress

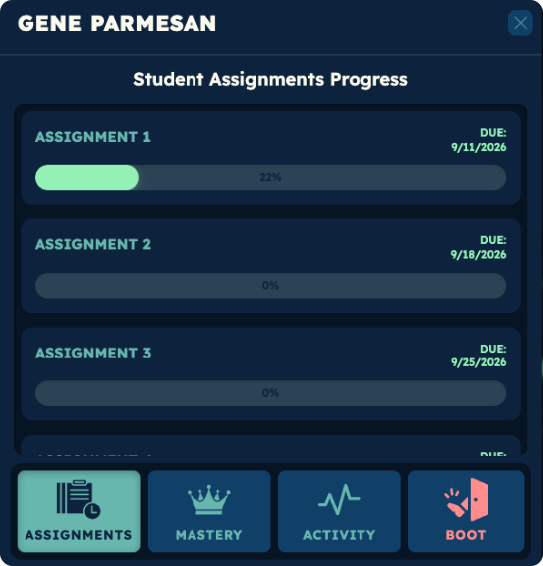
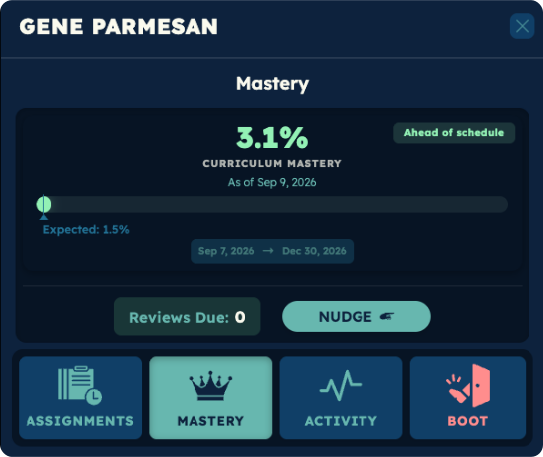
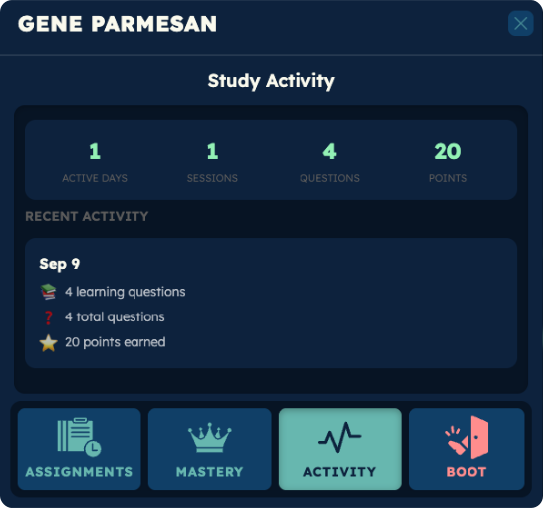
Click any student row to open a detailed view of their progress across three tabs.

Assignments

See every assignment, its due date, and how much of it the student has completed.

Student Assignments Progress tab
Mastery

See the student's current curriculum mastery, how it compares with where they're expected to be today, and any Mastery Reviews currently due.

Student Mastery tab
Activity

See active days, study sessions, questions answered, and points earned, plus a day-by-day activity history.

Student Study Activity tab

Need to remove a student from the class? Use the red BOOT tab.

Quick Check